 English
 Spanish
 French
 Japanese
 Korean
 Dutch
 German
 Portuguese
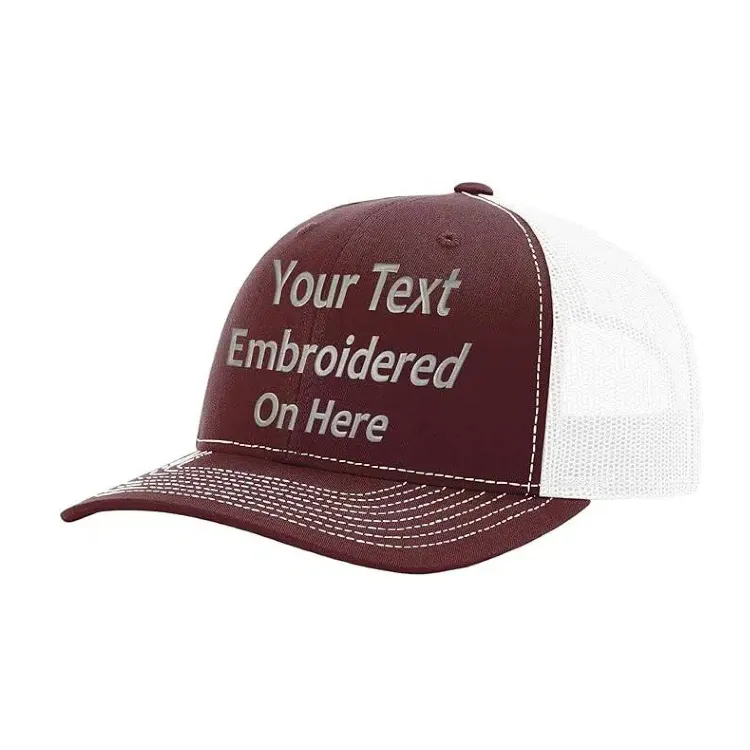
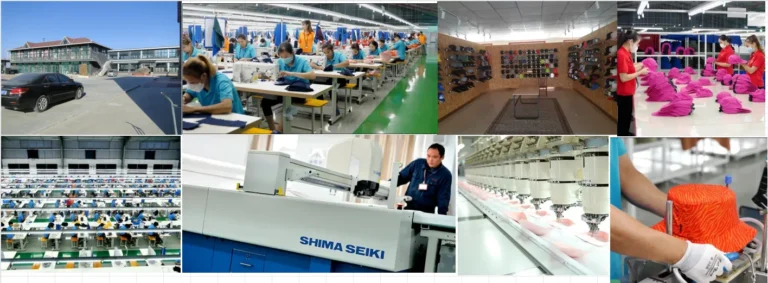

How to Prevent Embroidery Defects on Custom Hats
Embroidery is one of the most popular decoration methods for custom hats. From embroidered baseball caps and trucker hats to snapbacks and dad hats, a well-executed embroidered logo can give a product a premium appearance and strengthen brand identity.
However, embroidery defects can affect the appearance, consistency, and perceived quality of custom headwear. Common problems include puckering, uneven stitches, loose threads, distorted lettering, incorrect logo placement, and inconsistent 3D puff embroidery.
For brands, wholesalers, and promotional product buyers ordering custom hats in bulk, these problems can become expensive if they are not identified before mass production.
How to prevent embroidery defects on custom hats? The key is to combine suitable fabric selection, accurate embroidery digitizing, correct backing materials, optimized machine settings, proper hooping, and sample approval before bulk production.
In this guide, we explain the most common embroidery defects on custom hats, why they happen, and how professional hat manufacturers can prevent them during production.
1. What Are the Most Common Embroidery Defects on Custom Hats?
Embroidery defects can occur at different stages, from artwork preparation and digitizing to machine operation and final inspection. Understanding these problems helps buyers communicate their requirements more clearly with manufacturers.
| Embroidery Defect | Common Appearance | Possible Cause |
|---|---|---|
| Fabric Puckering | Wrinkles or waves around the embroidered logo | Incorrect tension, excessive stitch density, or insufficient stabilization |
| Uneven Stitches | Inconsistent stitch lengths or irregular embroidery surfaces | Incorrect digitizing or unsuitable machine settings |
| Loose Threads | Visible thread loops or loose thread ends | Improper thread tension or incomplete trimming |
| Skipped Stitches | Small gaps or missing sections in the logo | Needle problems, thread breakage, or machine timing issues |
| Thread Breakage | Interrupted embroidery lines or unfinished details | Incorrect needle selection, thread quality, or tension |
| Distorted Logo | Letters, shapes, or outlines look stretched or compressed | Incorrect digitizing, fabric movement, or pull compensation |
| Uneven 3D Puff Embroidery | Raised sections have inconsistent height or shape | Incorrect foam selection, stitch coverage, or embroidery settings |
| Incorrect Logo Placement | Logo appears too high, low, or off-center | Inaccurate positioning or improper hooping |
Not every embroidery issue has the same root cause. A defect that appears to be a machine problem may actually originate from the original artwork or digitizing file.
2. Start with Proper Embroidery Artwork and Digitizing
One of the most important steps in preventing embroidery defects is preparing the artwork correctly before production.
Unlike printing, embroidery converts digital artwork into physical stitches. A design that looks perfect on a computer screen may not produce the same result when stitched onto a curved and relatively small hat panel.
2.1 Simplify Designs That Contain Excessive Details
Very small text, thin outlines, tiny gaps, and complicated graphic elements can be difficult to reproduce accurately with embroidery.
For example, a logo containing extremely small lettering may become difficult to read when stitched onto the front panel of a baseball cap.
To improve embroidery results:
- Avoid excessively small lettering and narrow decorative lines.
- Increase the size of important text where possible.
- Remove unnecessary details that may become unclear after stitching.
- Use suitable stitch types for different logo elements.
- Maintain enough spacing between letters and design components.
- Review the artwork at its actual embroidery size, not only at full-screen size.
2.2 Use Professional Embroidery Digitizing
Embroidery digitizing converts artwork into machine-readable stitch instructions. It determines stitch direction, stitch length, stitch density, underlay, sequencing, and other technical settings.
Good digitizing is especially important for custom hats because the front panel is curved and may contain reinforcement materials.
Professional digitizing should consider:
- Stitch direction: Appropriate stitch angles help create a smooth and consistent embroidery surface.
- Stitch density: Density must be sufficient for good coverage without placing excessive stress on the fabric.
- Underlay stitches: Suitable underlay helps stabilize the design and support the top stitches.
- Pull compensation: Adjustments help account for fabric movement and the tendency of embroidery elements to pull inward.
- Stitch sequencing: A suitable sewing sequence can reduce unnecessary movement and improve registration.
A design digitized for a flat garment panel should not automatically be used for a curved cap front without checking its suitability.
2.3 Choose the Right Stitch Type
Different parts of an embroidered logo require different stitch structures.
| Stitch Type | Typical Application | Important Consideration |
|---|---|---|
| Satin Stitch | Letters, borders, and narrow shapes | Suitable stitch width and direction are important for smooth coverage. |
| Fill Stitch | Larger solid areas and graphic shapes | Density and stitch direction should be optimized to avoid stiffness and puckering. |
| Running Stitch | Fine outlines and small details | Stitch length and path stability affect the appearance. |
| 3D Puff Embroidery | Raised lettering and bold logos | Foam thickness, stitch coverage, and design suitability must be considered. |
The correct stitch combination depends on the logo artwork, hat material, design size, and desired appearance.
3. Select the Right Fabric for Embroidery
Fabric selection has a direct influence on embroidery quality. Different materials react differently to needle penetration, thread tension, and stitch density.
A fabric that is too thin, soft, stretchy, or unstable may move during embroidery, resulting in puckering or distorted logos.
3.1 Consider Fabric Structure and Stability
Common fabrics used for custom embroidered hats include:
| Fabric | Embroidery Characteristics | Typical Hat Applications |
|---|---|---|
| Cotton Twill | Generally provides a stable surface for many embroidery designs | Baseball caps, dad hats, and casual caps |
| Polyester | Suitable for many embroidery applications; settings should account for fabric construction | Sports caps and performance hats |
| Canvas | Denser construction can support bold embroidery designs | Workwear hats and lifestyle caps |
| Nylon | Lightweight and potentially sensitive to needle holes and distortion | Outdoor caps and lightweight 5-panel hats |
| Mesh | Open construction requires suitable embroidery positioning and support | Trucker hats and mesh-back caps |
For large or dense embroidery designs, manufacturers should evaluate the fabric’s stability and compatibility before confirming the production method.
Read our detailed guide: How to Choose Fabric Weight for Custom Hats.
3.2 Use Suitable Backing Materials
Backing, also known as stabilizer, supports the fabric during embroidery and helps prevent unwanted movement.
Different embroidery projects may require different backing materials depending on fabric weight, stretch, construction, and design complexity.
- Cut-away backing: Provides longer-lasting stabilization and is often useful for unstable or stretchable fabrics.
- Tear-away backing: Can be suitable for relatively stable fabrics and certain embroidery applications.
- Additional reinforcement: May be necessary for large, dense, or heavy embroidery designs.
The backing should provide sufficient support without making the finished hat unnecessarily stiff or uncomfortable.
Using too little stabilization can cause fabric distortion, while excessive or unsuitable backing can affect the feel and finishing of the product.
4. Control Thread Tension and Needle Selection
Correct machine settings are essential for consistent embroidery quality. Even when the artwork and materials are suitable, incorrect thread tension or needle selection can create visible defects.
4.1 Maintain Proper Thread Tension
Thread tension controls how the upper and bobbin threads interact during stitching.
If the tension is too tight, the fabric may pull or pucker. If it is too loose, the embroidery may contain visible loops, loose stitches, or an uneven appearance.
To reduce tension-related defects:
- Check upper-thread and bobbin-thread tension before production.
- Use suitable thread types and thread weights.
- Inspect stitch formation during machine setup.
- Adjust settings according to the fabric and embroidery design.
- Monitor thread tension throughout longer production runs.
There is no single tension setting suitable for every hat. Machine settings should be adjusted according to the actual materials and embroidery requirements.
4.2 Choose the Appropriate Embroidery Needle
Needle selection also affects stitch formation and fabric appearance.
Factors to consider include:
- Fabric thickness and construction.
- Embroidery thread type and weight.
- Logo density and stitch complexity.
- Needle point suitability for the selected material.
A damaged, dull, or incorrectly selected needle may cause thread breakage, skipped stitches, or unnecessary fabric damage.
Regular needle inspection and replacement are important parts of embroidery machine maintenance.
5. Prevent Puckering on Custom Embroidered Hats
Puckering is one of the most noticeable embroidery defects on custom caps. It occurs when the fabric around the embroidered area becomes wrinkled, distorted, or uneven.
This problem is particularly concerning for brands that require a clean and premium front-panel appearance.
Why Does Embroidery Puckering Happen?
Common causes include:
- Excessive stitch density.
- Incorrect thread tension.
- Insufficient backing or stabilization.
- Unstable or lightweight base fabric.
- Incorrect hooping or frame tension.
- Unsuitable digitizing settings.
How Can Manufacturers Prevent It?
- Optimize stitch density: Avoid unnecessary stitches that place excessive stress on the fabric.
- Use suitable backing: Select stabilizers according to fabric construction and logo complexity.
- Control hooping tension: Keep the material stable without stretching or deforming it.
- Adjust thread tension: Test the settings on the actual hat material.
- Test the complete design: Evaluate the finished embroidery after removing the hat from the machine.
It is important to inspect the embroidery after the fabric has relaxed. A design may appear acceptable while still held in the embroidery frame but show distortion after removal.
6. Pay Special Attention to 3D Puff Embroidery
3D puff embroidery is widely used on snapback hats, streetwear caps, and premium branded headwear. It creates a raised effect by stitching over foam placed beneath the embroidery.
Although 3D puff embroidery creates a distinctive appearance, it requires more precise production control than many standard flat embroidery designs.
Common 3D Puff Embroidery Problems
- Uneven raised height across letters or shapes.
- Visible foam around the edges.
- Incomplete foam coverage.
- Collapsed or flattened sections.
- Irregular lettering and distorted outlines.
- Excessive stitching that makes the design too hard or heavy.
How to Improve 3D Puff Quality
- Select foam with an appropriate thickness for the design.
- Use artwork with sufficiently bold and suitable shapes.
- Ensure the digitizing file provides adequate coverage around the foam.
- Adjust stitch density and sequencing to the selected foam.
- Check that small gaps and narrow lettering are suitable for puff embroidery.
- Inspect the edges after production and remove exposed foam where necessary.
Not every logo is suitable for 3D puff embroidery. Fine lettering, very narrow lines, and complicated small details may produce better results with flat embroidery.
For this reason, manufacturers should evaluate the artwork and recommend an appropriate embroidery method before bulk production.
7. Ensure Accurate Logo Positioning on Curved Hat Panels
Unlike flat garments, baseball caps and trucker hats have curved front panels. This makes accurate embroidery positioning more challenging.
Even a well-stitched logo can look unprofessional if it is slightly off-center or positioned too high or too low.
To achieve consistent positioning:
- Confirm the exact logo dimensions before production.
- Define the horizontal and vertical placement using clear reference points.
- Check the logo position against the center seam where applicable.
- Use suitable cap frames and positioning methods.
- Ensure the hat is properly secured during embroidery.
- Compare the finished embroidery with the approved sample.
For orders with multiple colors or different hat styles, each construction should be evaluated separately. A placement that works on a structured baseball cap may not look identical on an unstructured dad hat.
8. Approve an Embroidery Sample Before Bulk Production
Sample approval is one of the most effective ways to reduce embroidery-related risks in bulk custom hat orders.
A digital logo preview is useful for checking the general design, but it cannot fully demonstrate how the actual thread, fabric, and stitch construction will look together.
Before approving mass production, buyers should request a physical sample or an agreed production-representative embroidery sample.
What Should Buyers Check on an Embroidery Sample?
| Inspection Item | What to Confirm |
|---|---|
| Logo Size | Actual embroidery dimensions match the approved artwork. |
| Thread Colors | Thread shades are consistent with the agreed color references. |
| Stitch Quality | Stitches are clean, consistent, and properly covered. |
| Lettering | Text is readable and the shapes are correctly formed. |
| Fabric Surface | No unacceptable puckering, wrinkles, or distortion. |
| Logo Position | Embroidery is centered and positioned as specified. |
| 3D Puff Effect | Raised areas have the intended height and clean edges. |
| Overall Appearance | The finished sample matches the brand’s quality expectations. |
Once the sample is approved, it should become the reference standard for bulk production. Any changes to the artwork, thread colors, fabric, or embroidery construction should be reviewed and approved before implementation.
9. Implement Quality Control During Bulk Embroidery Production
Approving one sample is not enough to guarantee consistent results across a large order. Production conditions may change due to machine adjustments, material batches, thread changes, or operator handling.
For this reason, quality control should continue throughout bulk embroidery production.
Recommended Production Quality Checks
- First-piece inspection: Check the first production units before continuing with the full batch.
- Machine monitoring: Monitor thread breaks, skipped stitches, and machine performance.
- In-process inspection: Check embroidery quality at appropriate intervals during production.
- Thread color verification: Confirm that the correct thread colors are used for each design and colorway.
- Position consistency: Check that the logo remains correctly positioned across different hats.
- Final appearance check: Review completed embroidery for loose threads, exposed backing, and visible defects.
For large orders, early production checks are especially important. Identifying an embroidery problem after the first few pieces is much less costly than discovering it after thousands of hats have been completed.
10. Embroidery Defect Prevention Checklist for Buyers
Before confirming a bulk order of custom embroidered hats, buyers can use the following checklist to communicate their quality requirements to the manufacturer.
- ☐ Final logo artwork has been confirmed.
- ☐ Embroidery dimensions and placement have been specified.
- ☐ Small lettering and fine details have been reviewed for stitchability.
- ☐ Embroidery digitizing has been prepared for the actual hat construction.
- ☐ Suitable stitch types and density have been selected.
- ☐ Fabric stability and backing requirements have been evaluated.
- ☐ Thread colors have been approved.
- ☐ Machine settings and needle selection have been tested.
- ☐ A physical embroidery sample has been reviewed and approved.
- ☐ First-piece production quality has been confirmed.
- ☐ Bulk embroidery is monitored during production.
- ☐ Finished hats are checked before shipment.
For a more comprehensive finished-product inspection process, see our guide: How to Inspect Custom Hats Before Shipment.
11. How Embroidery Quality Affects the Cost of Custom Hats
Embroidery quality and production cost are closely connected. More complicated logos may require additional digitizing work, higher stitch counts, more thread changes, and longer machine running times.
However, choosing the lowest-cost embroidery option does not always produce the best value for a brand.
For example, reducing stitch density without considering the artwork may result in poor coverage or an uneven logo. Using unsuitable fabric or backing can also lead to defects that require rework or replacement.
To balance quality and cost, buyers should:
- Keep the logo design clear and suitable for embroidery.
- Avoid unnecessary tiny details.
- Choose the appropriate embroidery method.
- Confirm the stitch count and decoration requirements before quotation.
- Approve samples before bulk production.
- Discuss quality expectations and inspection standards with the manufacturer.
For more information about the factors that influence custom hat quotations, read Why Do Custom Hat Prices Vary So Much?.
12. Frequently Asked Questions About Custom Hat Embroidery
What causes puckering on embroidered hats?
Embroidery puckering is commonly caused by excessive stitch density, incorrect thread tension, insufficient stabilization, unstable fabric, or improper hooping. Professional digitizing and suitable backing materials can help reduce this problem.
How can I prevent embroidery from looking uneven on custom caps?
Use a properly digitized embroidery file, suitable stitch types, consistent thread tension, and appropriate machine settings. The fabric should also be secured correctly during embroidery. A production sample should be checked before bulk manufacturing.
Why does my embroidered logo look different from the digital design?
Digital artwork and physical embroidery are different production formats. Stitch direction, thread thickness, fabric texture, stitch density, and logo size can all affect the final appearance. This is why a physical embroidery sample is important before mass production.
Is 3D puff embroidery more difficult than flat embroidery?
Generally, yes. 3D puff embroidery requires additional foam preparation and more precise control of stitch coverage, design structure, and embroidery settings. Simple, bold designs usually work better than very small or highly detailed artwork.
What is the best fabric for custom embroidered baseball caps?
Cotton twill is a popular choice because it generally offers a stable surface for embroidery. However, polyester, canvas, nylon, and other materials can also be used depending on the hat design, fabric construction, and embroidery requirements.
Should I approve an embroidery sample before ordering bulk custom hats?
Yes. A physical sample allows you to evaluate logo size, thread colors, stitch quality, fabric compatibility, and positioning before committing to mass production. It also provides a clear reference for subsequent production quality checks.
Can small text be embroidered on custom hats?
Yes, but very small lettering can be difficult to reproduce clearly. The minimum practical size depends on the font, letter structure, fabric, thread, and digitizing quality. Simplifying the artwork or increasing the text size can improve readability.
Conclusion: Consistent Embroidery Quality Starts Before Production
Preventing embroidery defects on custom hats requires more than simply operating a high-quality embroidery machine. It starts with suitable artwork, professional digitizing, correct fabric selection, appropriate backing, and carefully adjusted production settings.
For B2B buyers, approving a physical sample and establishing clear quality standards before bulk production are essential steps in reducing production risks.
Working with an experienced custom hat manufacturer can also make it easier to identify potential embroidery problems early and select the right production solutions.
Looking for a Reliable Custom Hat Manufacturer?
QINGDAO SINOTIN HEADWEAR CO., LTD. is a professional custom hat manufacturer in China, providing OEM and ODM headwear solutions for brands, wholesalers, distributors, and promotional product companies.
Our custom headwear options include:
- Custom embroidered baseball caps
- Custom logo trucker hats
- 3D puff embroidered snapback hats
- Custom embroidered dad hats
- Patch hats and private-label headwear
- Custom sports and outdoor caps
Whether you need a simple embroidered logo or a more complicated multi-color design, our team can help evaluate your artwork, recommend suitable embroidery techniques, and develop samples before bulk production.
Have a custom hat project in mind?
Send us your logo, reference pictures, target quantity, and customization requirements. Contact our team to discuss your project and get a quotation.